How to Create a CI/CD Pipeline to Host a Static Website

Use Case: Your team has asked you to create a way to automate the deployment of a website. Currently, your developers have to go through the process manually to test each new update to their code. You’ll need to provide the static site URL to the developers and also make a modification to the code in the GitHub repo to verify the pipeline is working. Your app is very popular all around the world but some users are complaining about slow load times in some Regions. You have been asked to add CloudFront as a CDN for your static website. CloudFront should allow caching of your static webpage and only allow HTTPS traffic to your site.
Terms:
Amazon S3: Amazon S3 is an object storage service that can accommodate the storage needs of businesses and individuals alike, with a focus on scalability, security, and performance
CI/CD (Continuous Integration/Continuous Deployment): It is a fundamental approach in software development that emphasizes automation, collaboration, and iterative improvement.
GitHub: GitHub is a powerful platform that promotes collaboration, version control, and efficient code development. It has become an essential tool for developers and organizations worldwide.
CloudFront: Amazon CloudFront is a content delivery service that accelerates the distribution of web content by leveraging a global network of edge locations. It enhances the speed, reliability, and security of delivering content to users, making it a valuable tool for websites and applications with a global user base
Goals:
- Create a S3 bucket.
- Create a CI/CD Pipeline.
- Deploy the Pipeline and verify that you can reach your static website. Make an update to the code in GitHub and verify the change in your static website.
- Advanced: Add CloudFront as a CDN for your static website.
Create and configure an S3 bucket to deploy your GitHub files.
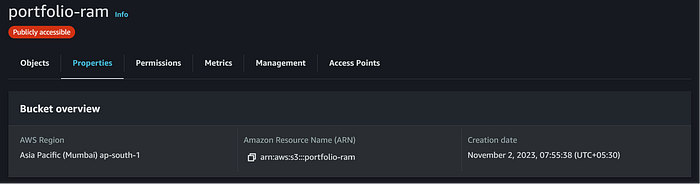
Go to S3>Create a bucket and name your bucket.

Uncheck Block all public access and acknowledge. Keep the default settings and click the Create button.

Enable Bucket versioning (Optional).

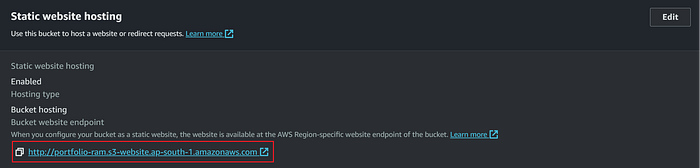
Go to the Properties tab and scroll to the bottom to the Edit static website hosting section. Enable Static website hosting and choose Host a static website as the Hosting type. Enter the Index document name and Error document then click the Save Changes button.

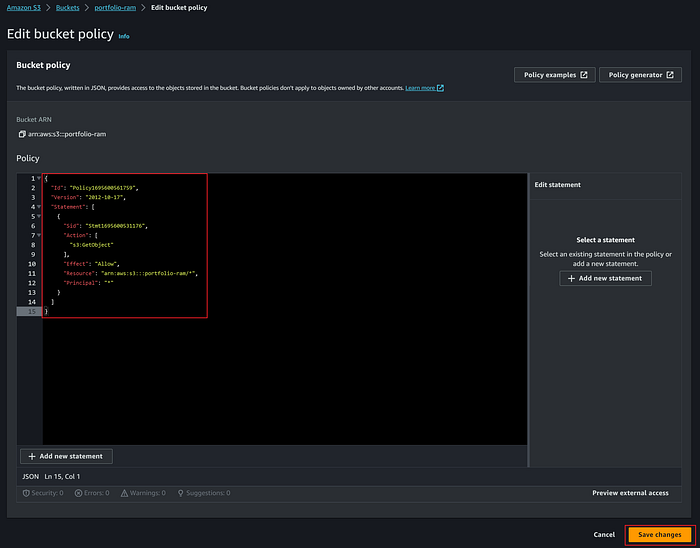
Go to the Permissions tab>Edit bucket policy. Paste below bucket policy and then click the Save Changes button. Make sure you update the “Resource”:”arn: your arn/*” with your s3 bucket arn and add /* so that you add all files within your bucket.
{
  "Id": "Policy1695600561759",
  "Version": "2012-10-17",
  "Statement": [
    {
      "Sid": "Stmt1695600531176",
      "Action": [
        "s3:GetObject"
      ],
      "Effect": "Allow",
      "Resource": "arn:aws:s3:::portfolio-ram/*",
      "Principal": "*"
    }
  ]
}
Create CodePipeline
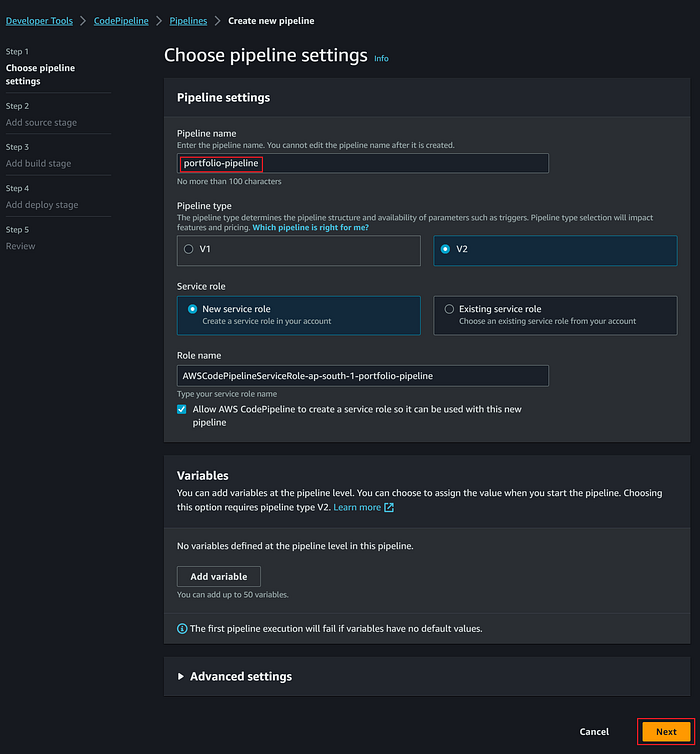
Go to CodePipeline>Create pipeline>Name your Pipeline>Choose New service role> Click Next button.
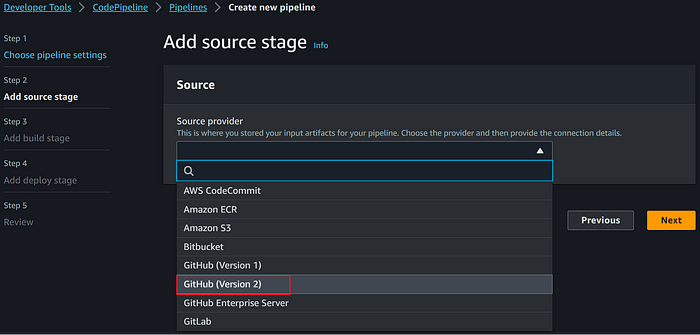
Select GitHub (Version 2) as the Source provider
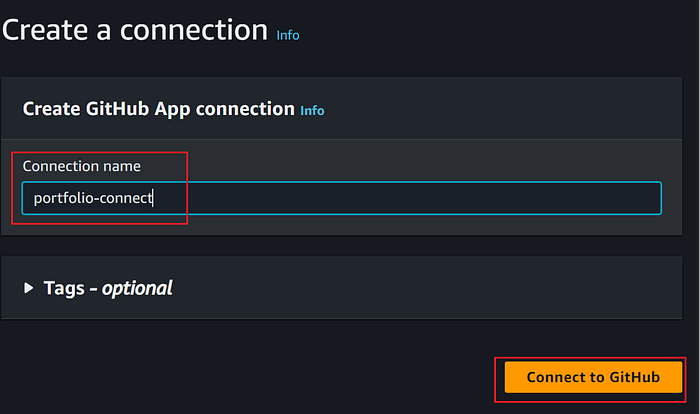
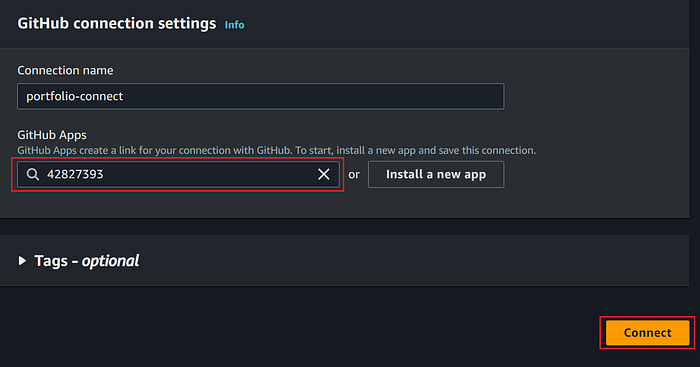
Click the Connect to GitHub button.
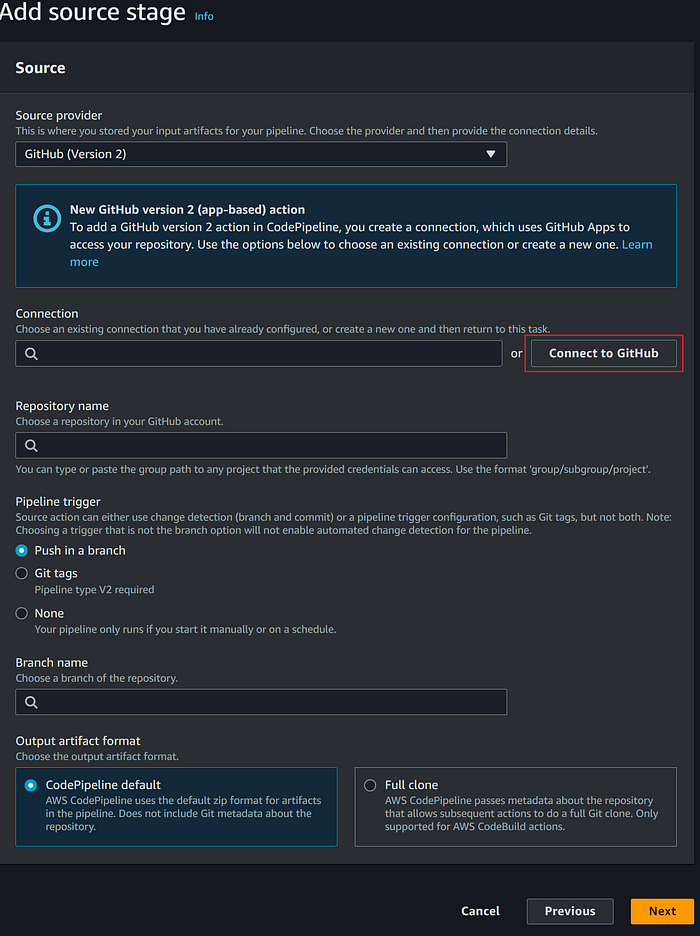
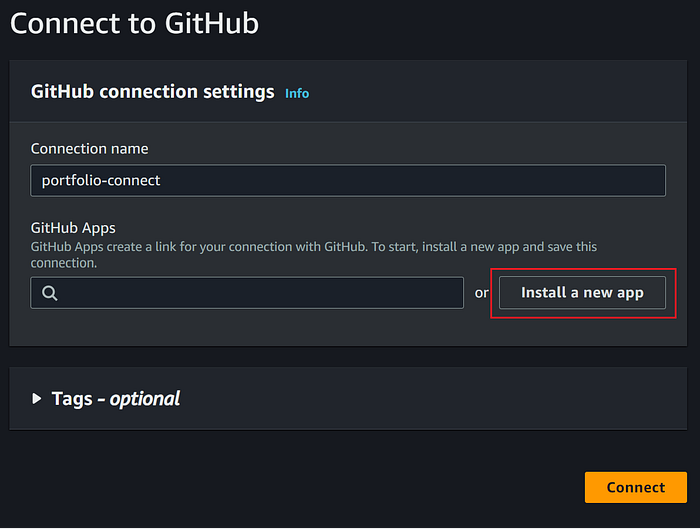
Give it a name. Click the Connect to GitHub button.
Click the Install a new app button.
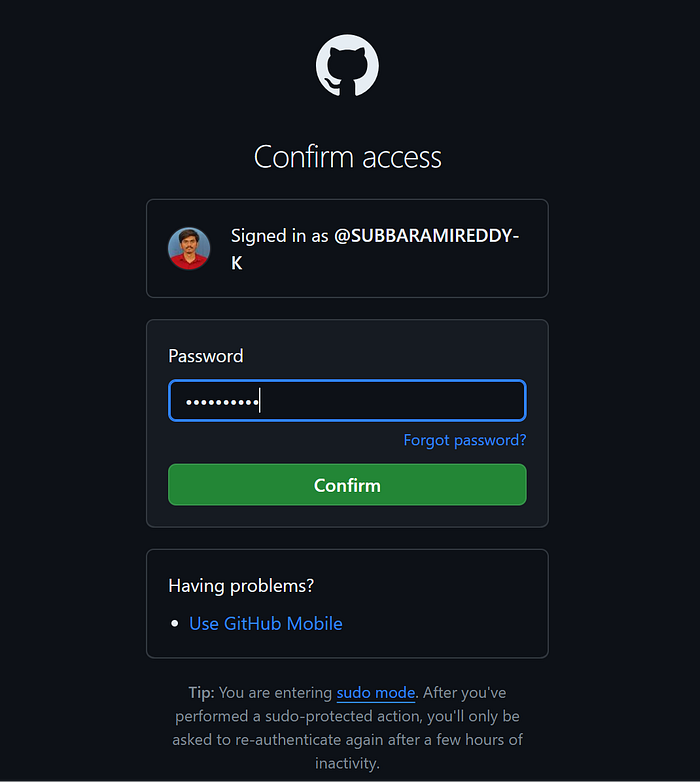
It will redirect to your GitHub account. confirm with your credentials.
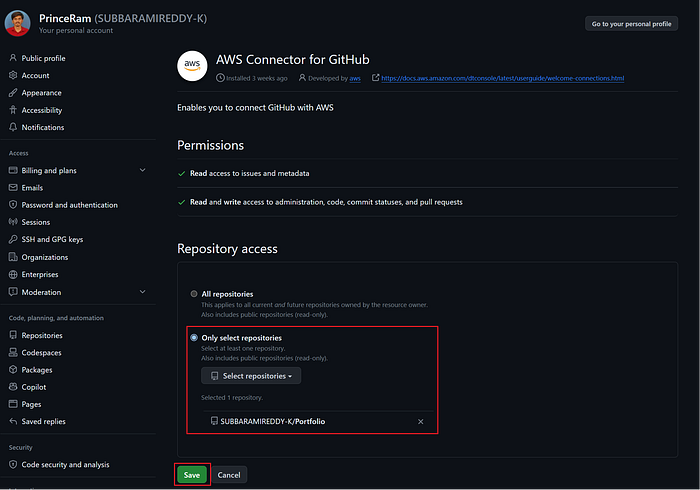
Select Only select repositories and select your portfolio repository. Click the Save button.
Click the Connect button.
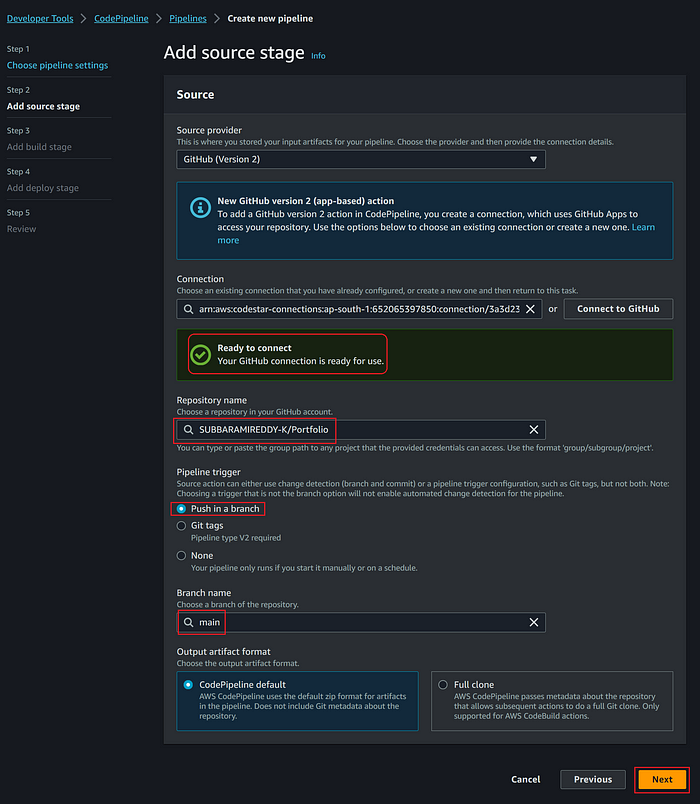
Give your Repository Name, select the Branch name and click Next.
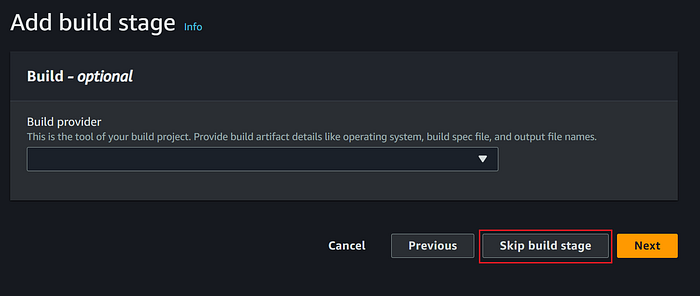
Click Skip build stage.
Add deploy stage as Amazon S3. Choose the Region your S3 bucket was created in and then select the S3 bucket you just created for your portfolio. Make sure to select Extract file before deploying because Codepipleline compresses the artefact.

Review and then click Create pipeline. Now you have deployed your pipeline successfully.

Testing
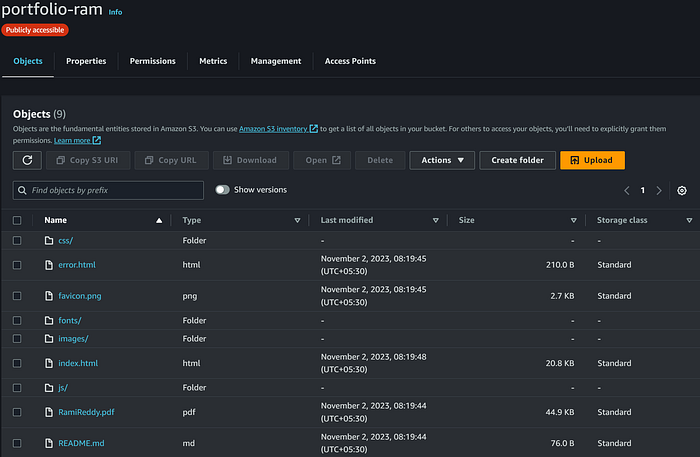
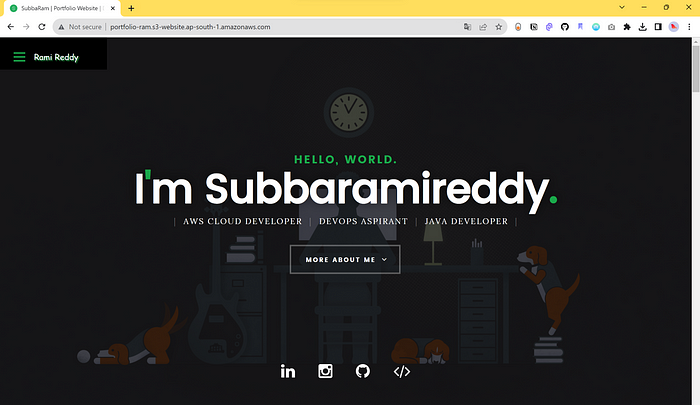
Go to S3>Your bucket and confirm if you have README.md and index.html files.
Click Properties scroll to the bottom copy the Bucket website endpoint address and paste it into the web browser.
Yay! Success! We have access to the portfolio webpage.
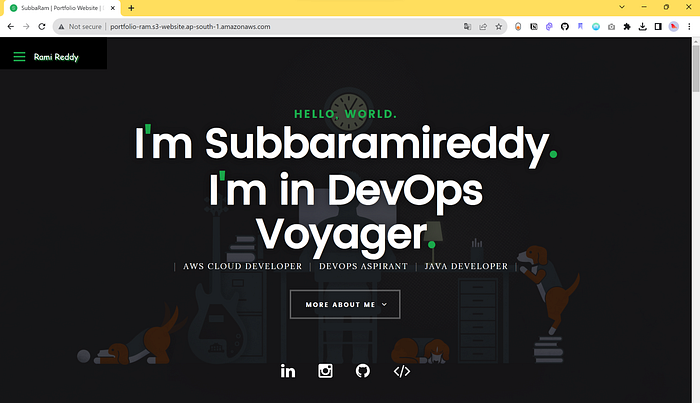
Go to the GitHub repository and edit the index.html file. I added the I am in DevOps VoygaerClick commit changes.

Now refresh the webpage. Yes, the changes have been made. This is the power of CodePipeline!
Advanced: Add CloudFront as a CDN for your static website.
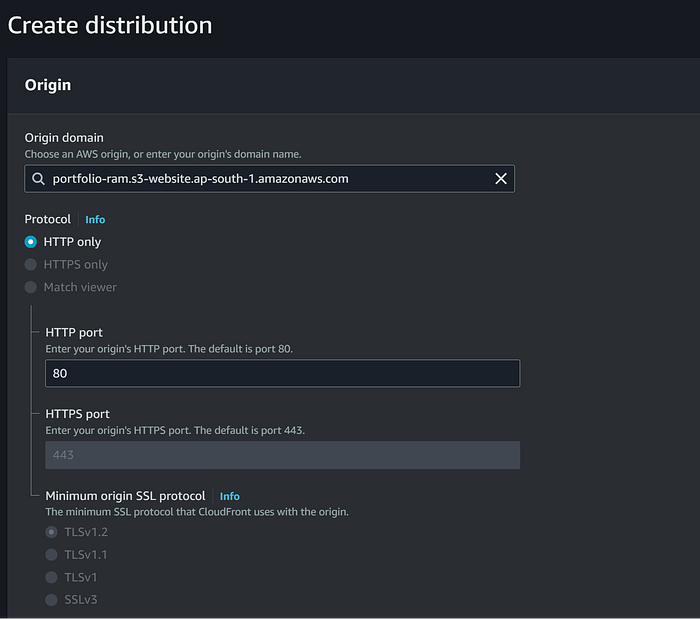
Go to CloudFront>Create distribution>Choose the Amazon S3 bucket you just created and click on Use website endpoint.

select the default settings.
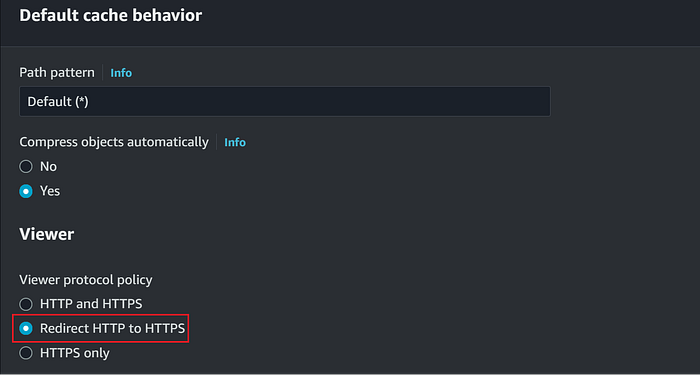
Make sure to change the Viewer protocol policy to Redirect HTTP to HTTPS.
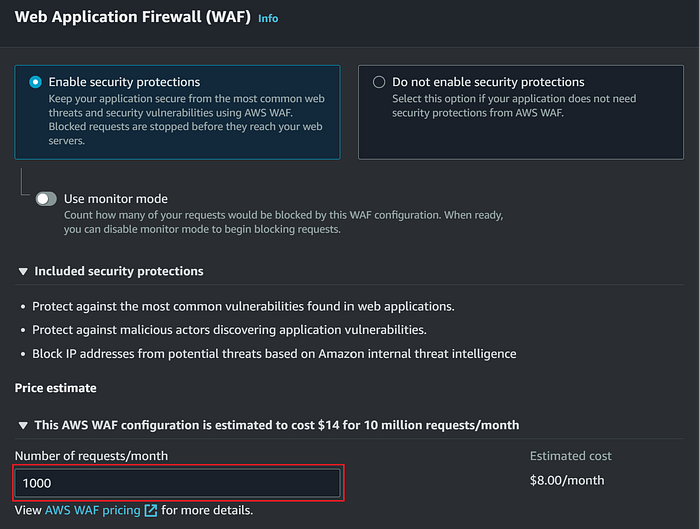
Enable the WAF(optional) to avoid the DDOS Attack (charges are applicable) and click Create Distribution.
Open the CloudFront Distribution you just created click the General tab and copy the Distribution domain name.
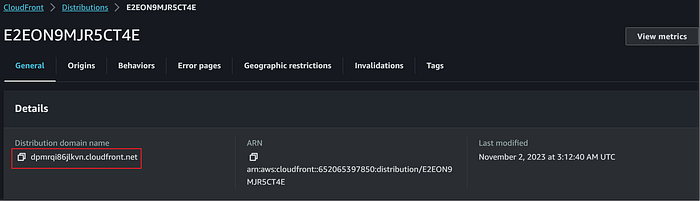
Paste the address https://dpmrqi86jlkvn.cloudfront.net/ in the browser.
Yay! Success!

Thanks for reading! I hope you found this helpful and informative.
I’m always happy to connect with fellow tech enthusiasts and answer any questions you may have. Don’t forget to follow me for more updates on tech, programming, and more.😄😄
